
Contents
Before you start
Tools required
Replace the bean temperature sensor
Finish up
Before you start
 DISCLAIMER
The information in this document is believed to be accurate and reliable. However, the manufacturer does not give any representations or warranties, expressed or implied, as to the accuracy or completeness of such information and shall have no liability for the consequences of the use of such information. The manufacturer is not liable or responsible for any problems arising from the attempted repair. The manufacturer reserves the right to make changes to information published in this document, including without limitation specifications and product descriptions, at any time and without notice. The manufacturer's products are not designed, authorized, or warranted to be suitable for use in applications where failure or malfunction can reasonably be expected to result in personal injury, death, or severe property or environmental damage. The manufacturer accepts no liability for inclusion and/or use of its products in such equipment or applications and therefore such inclusion and/or use is for the customer’s own risk.
SAFETY INSTRUCTIONS
-
Make sure the roaster is turned off before starting any maintenance work.
-
The power cord must be unplugged or the roaster fully isolated from the electrical supply before removing any panels.
-
Read the instructions in full before starting work, and follow the steps as instructed below
Tools required
- 2.5 mm hex key
- 3 mm hex key
- Wire cutter
- Small screwdriver or other pointed tool
- BT installation tool (open-sided socket wrench) or needle-nose pliers
- Cable ties
Replace the bean temperature sensor
Identify which sensor is faulty
On the touchscreen, tap on the gear icon to enter the settings menu. Tap on ‘Troubleshooting’ and then ‘Debug Sensor View’ to identify which temperature sensor is showing an incorrect reading (or no reading).
For example "Port TC Bean temp (TC11)".
If you are looking at the roaster from the front, Port side is the right-hand side, Starboard is the left.
Remove the rear panel and right / left-hand side panel
See instructions here.
Locate and disconnect the faulty sensor
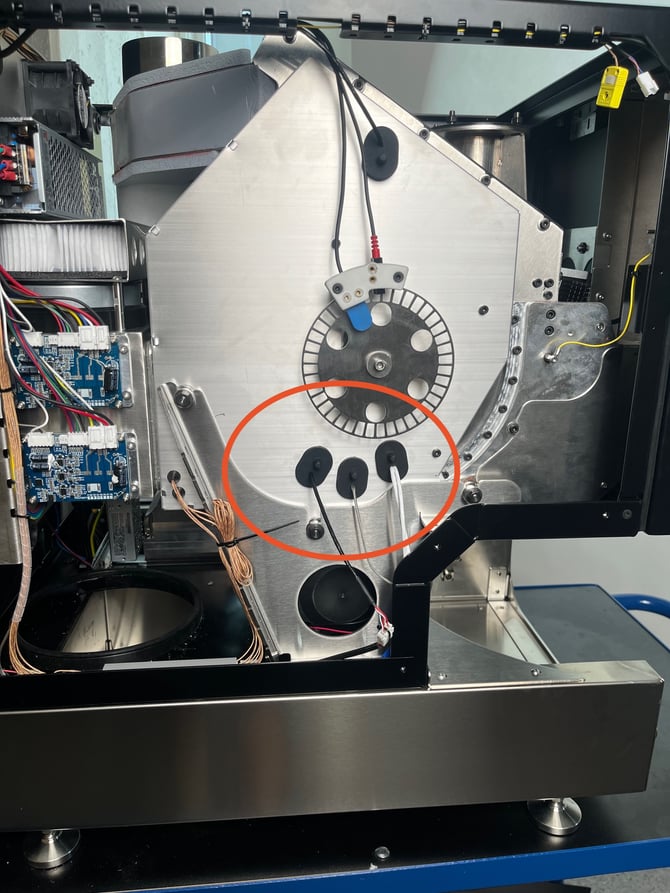
Look at the side of the machine to locate three gaskets with wires running through them. These wires connect to the sensors.
The two closest to the back of the machine are the bean temperature sensors. The third sensor, with the white cables attached, is the drum temperature RTD sensor.
For thermocouples
Perform these steps if you are replacing a thermocouple.
Remove the sensor
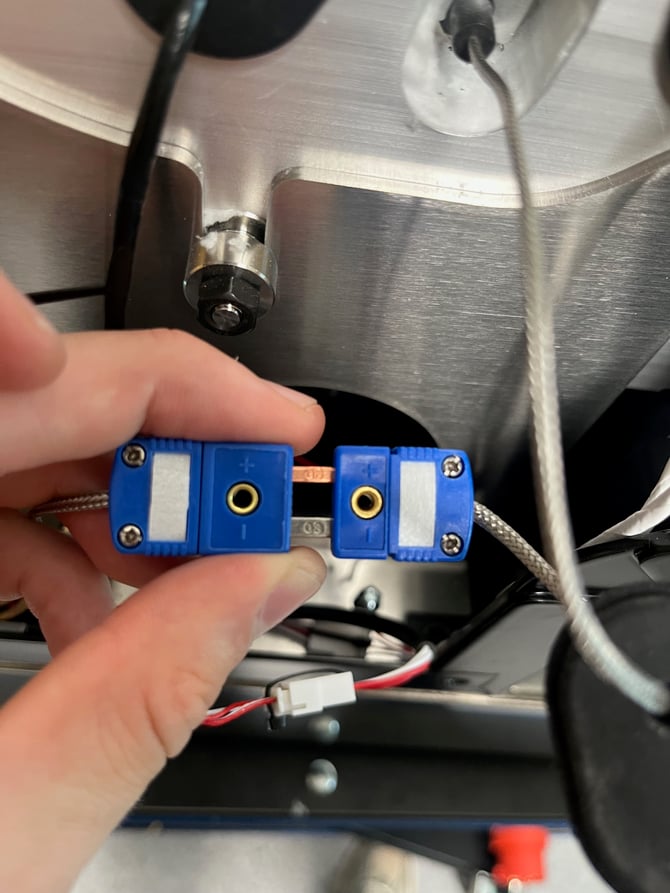
Disconnect the sensor at the blue contact point to make the removal process easier.
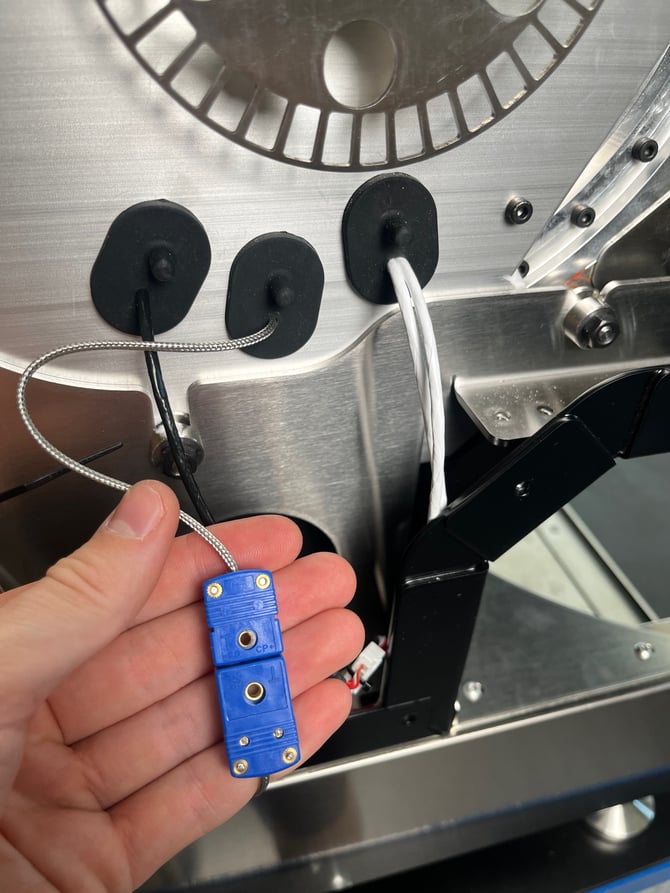
The bean temperature sensor is secured to the side of the roasting chamber with a bolt and a small plate behind a gasket. Pull the gasket away to access the sensor.
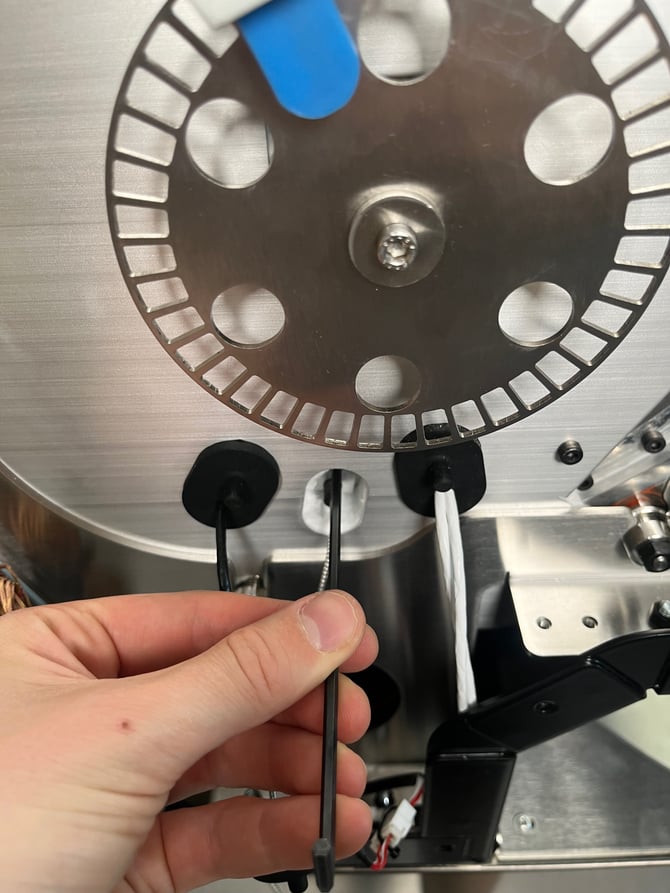
Remove the bolt using a 3 mm hex key, then remove the small metal plate. Unscrew the sensor from the drum using the BT sensor installation tool.
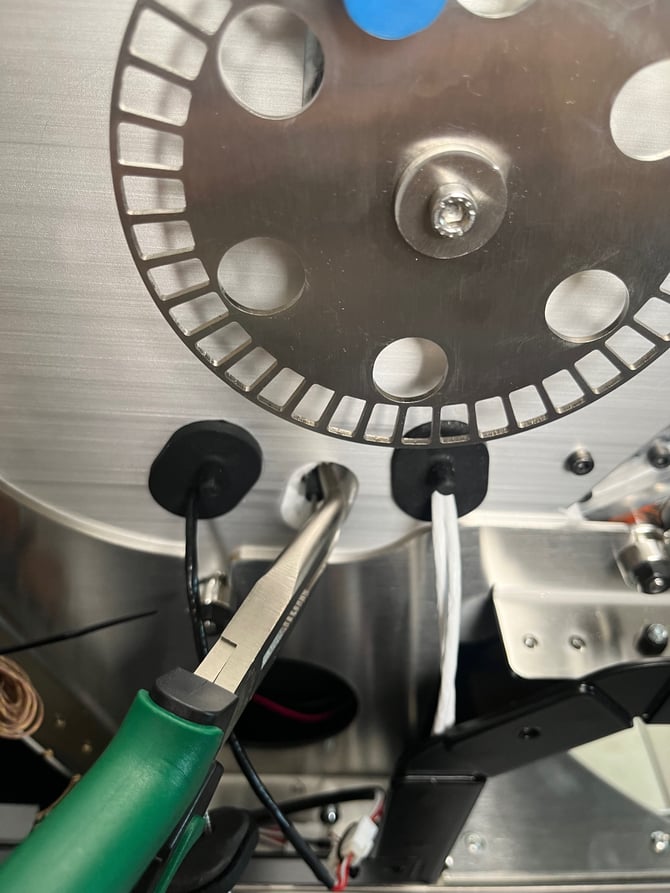
Alternatively, use pliers to loosen the sensor, then unscrew it completely with your fingers.
Install new sensor
Insert the new sensor into the mounting port. Fasten it by hand, then lightly tighten it with the BT probe installation tool or pliers. If using pliers, take care to only grip the nut (the hexagonal part) with the pliers to prevent damage to the new sensor body.
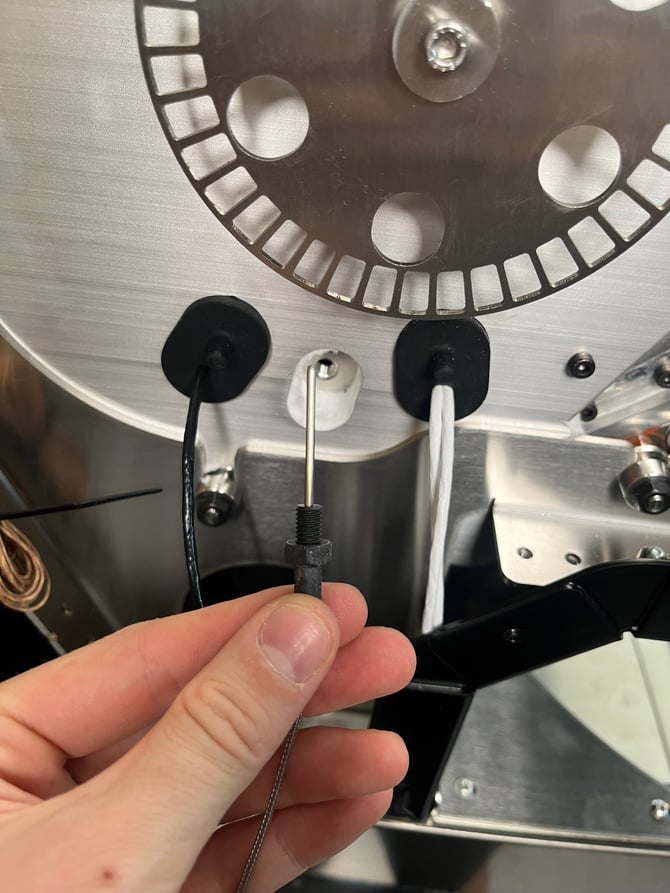
Reconnect the contact for the thermocouple and tuck away the slack wire. Ensure the polarity is correct by matching the positive (+) and negative (-) terminals.
For RTD sensors
Perform these steps if you are replacing a Resistance Temperature Detector (RTD) sensor.
The procedure for RTD sensors are the same as for the thermocouples, but the connection is different.
Locate the RTD sensor to the left of the thermocouple and remove the surrounding gasket.
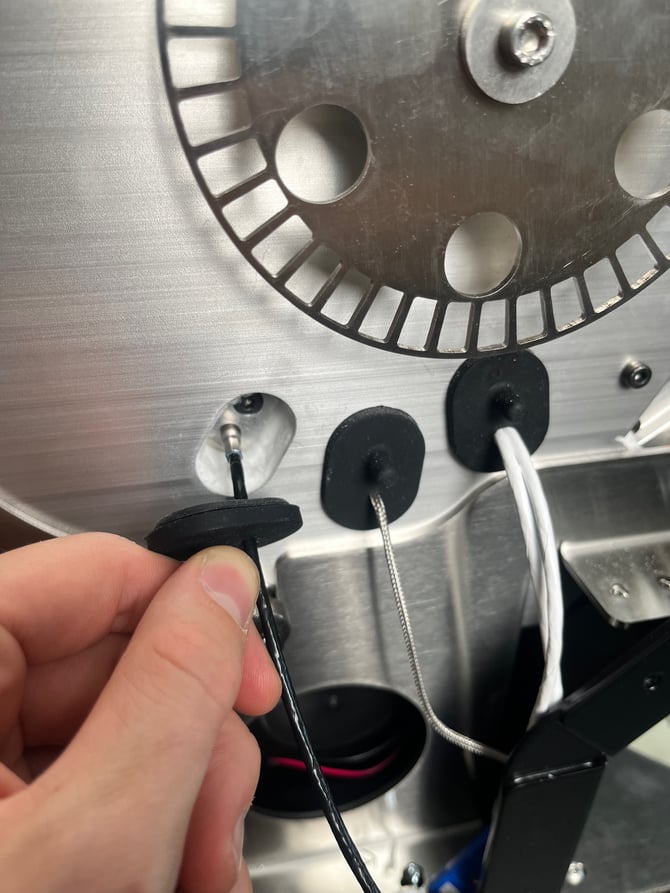
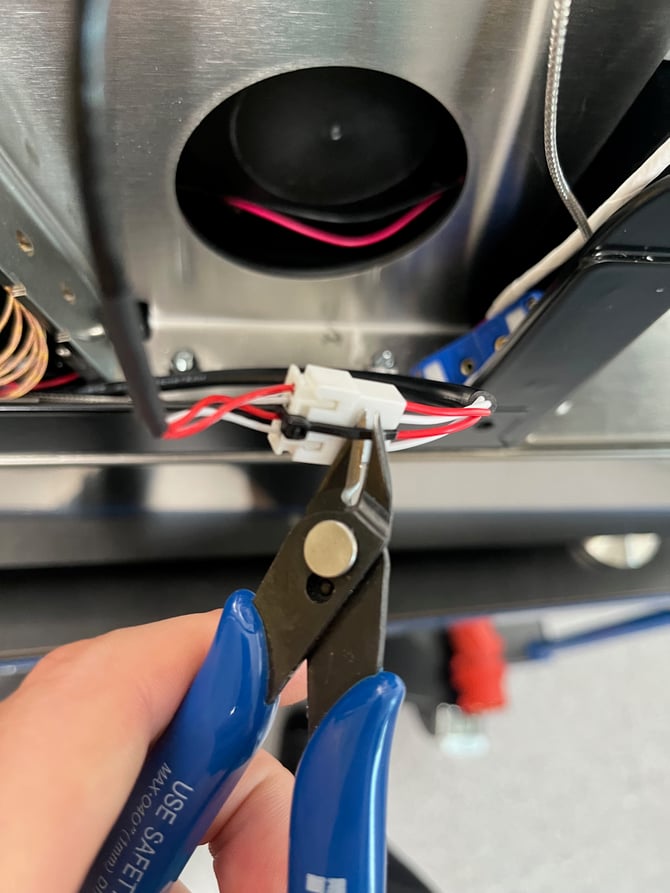
Cut the cable tie on the contact using a wire cutter before unplugging. Pull directly on the connector to disconnect it; do not pull on the wire.
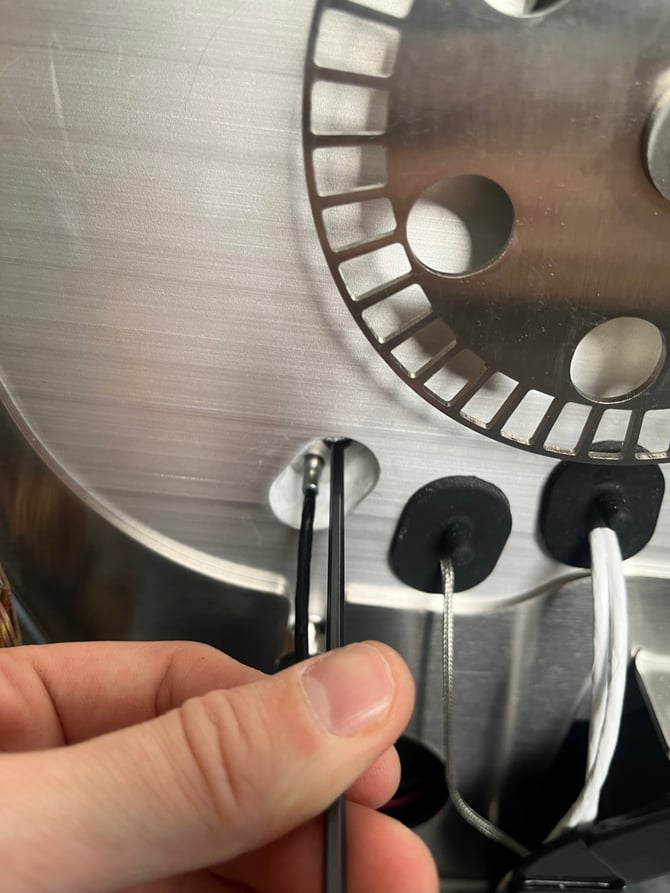
Remove the bolt using a 3 mm hex key, then remove the plate. Unscrew the sensor from the drum using the BT sensor installation tool.
Alternatively, use pliers to loosen the sensor, then unscrew it completely with your fingers.
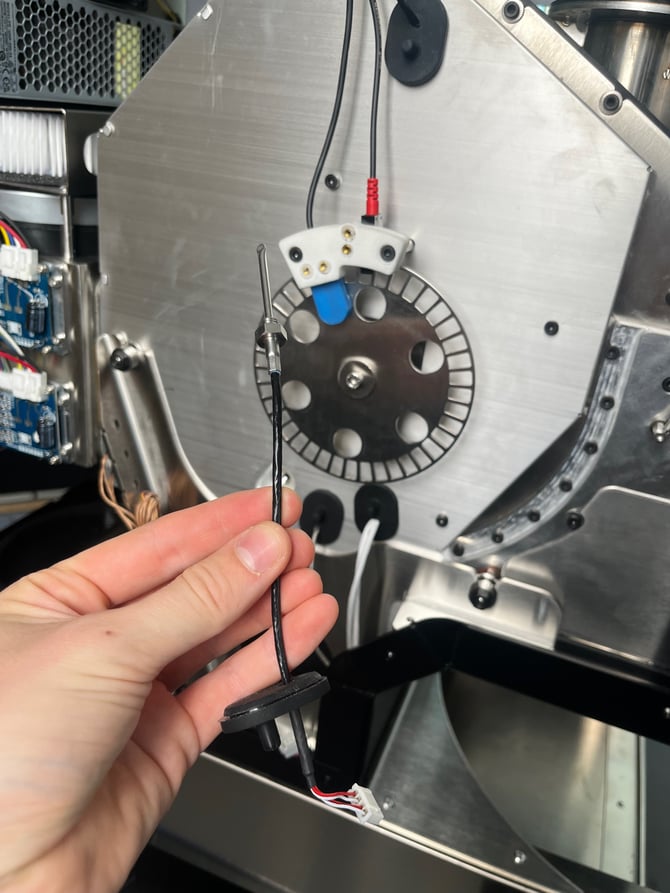
Insert the new sensor into the port and tighten it with your fingers. Fasten it by hand, then lightly tighten it with the BT probe installation tool or pliers. If using pliers, take care to only grip the nut (the hexagonal part) with the pliers to prevent damage to the new sensor body.
Reinstall the metal plate and screw. Push the gasket back into its original position.
Finish up
Reinstall the panels and reconnect the Wi-Fi aerial.
Once installation is complete, reconnect and switch on the roaster, and confirm the BT sensor is working correctly. Tap on ‘Troubleshooting’ and then ‘Debug Sensor View’ to check the inlet sensor readings. Verify that the reading from the new sensor is similar to the readings from the other sensors.
If the reading looks correct at room temperature, try enabling the heaters on the roaster and check again to ensure that the reading is still correct when the roaster heats up. An onscreen error message will alert you if there is no reading from the sensor, or if the reading diverges significantly from the other sensors.