
Contents
Before you start
Tools required
Open the front door
Remove side panels
Remove top panel
Replacing panels
Before you start
 DISCLAIMER
The information in this document is believed to be accurate and reliable. However, the manufacturer does not give any representations or warranties, expressed or implied, as to the accuracy or completeness of such information and shall have no liability for the consequences of the use of such information. The manufacturer is not liable or responsible for any problems arising from the attempted repair. The manufacturer reserves the right to make changes to information published in this document, including without limitation specifications and product descriptions, at any time and without notice. The manufacturer's products are not designed, authorized, or warranted to be suitable for use in applications where failure or malfunction can reasonably be expected to result in personal injury, death, or severe property or environmental damage. The manufacturer accepts no liability for inclusion and/or use of its products in such equipment or applications and therefore such inclusion and/or use is for the customer’s own risk.
SAFETY INSTRUCTIONS
-
Make sure the roaster is turned off before starting any maintenance work.
-
The power cord must be unplugged or the roaster fully isolated from the electrical supply before removing any panels.
-
Read the instructions in full before starting work, and follow the steps as instructed below
Tools required
- Flat-head screwdriver, coin, or similar to open front door
- 2.5 mm hex key, to open all other panels
Open the front door
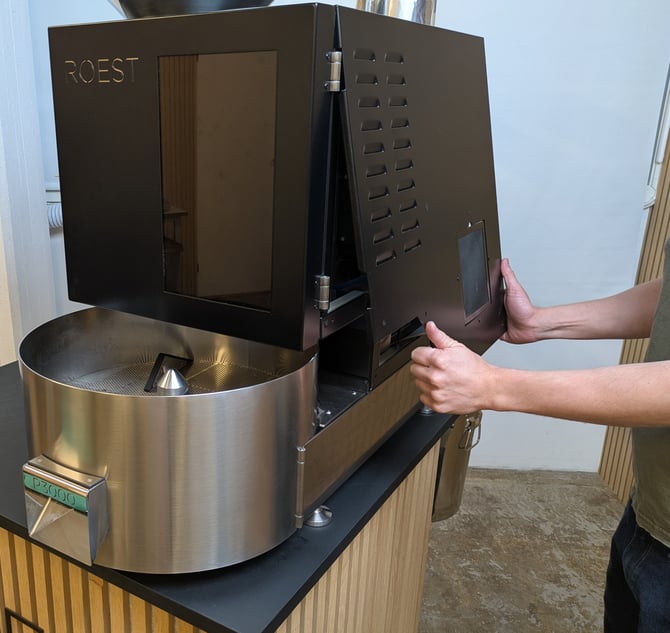
Turn the latch with a flat-head screwdriver, thin coin, or similar, and pull the door open.
Remove side panels
Open the front door as above before removing the side panels.
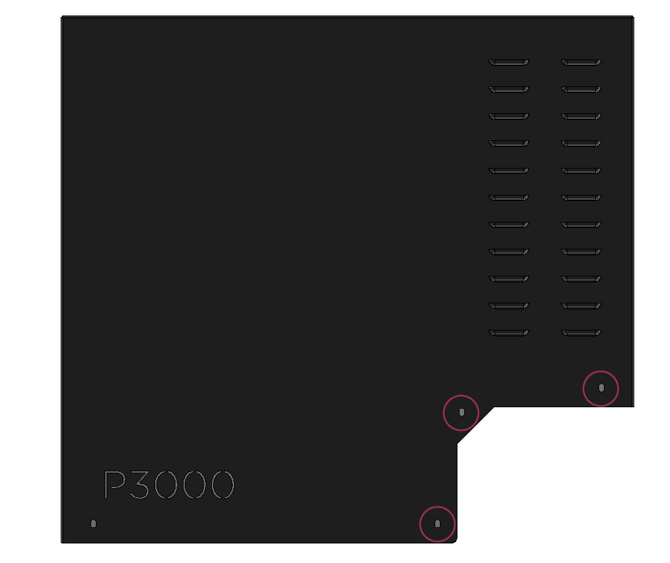
Remove the four bolts along the bottom edge of the panel using a 2.5 mm hex key. Pull the base of the panel towards you, and then lift the panel up to remove it. Set the panel aside.
The front 3 of the 4 bolts that secure the side panel are slightly longer (8 mm) than all other panel bolts (6 mm). Use the longer bolts in the same locations (circled in red in the image below) when you reinstall the panel.
Remove rear panel
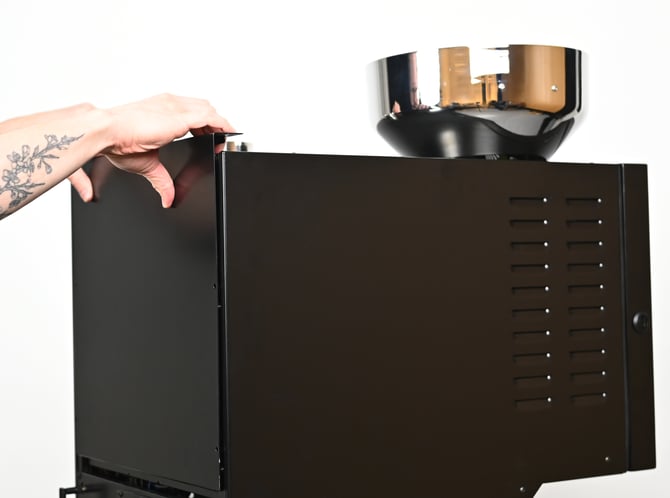
Remove the bolts securing the rear panel using a 2.5 mm hex key. There are 4 bolts on the back face, and 2 on top. Lift the panel up to remove it and set aside.
Remove top panel
The top panel is made of two sections, so that in most installations it can be removed without disconnecting the exhaust ducting. However if the duct connection overlaps the top panel significantly, it may be necessary to disconnect the ducting before removing the top panel.
To remove the top panel, first remove both side panels and the rear panel as above.
Next, remove the hopper.
Finally, remove the bolts securing the top panel using a 2.5 mm hex key. There are 3 on the side furthest from the exhaust, and 5 on the side closest to the exhaust. The two bolts that secure the extra section next to the exhaust can be left in place unless you are disassembling the exhaust or cyclone.
Lift the panel slightly and slide it away from the exhaust connection to remove it.
Replacing panels
When replacing panels, loosely position all the bolts first, to ensure they're correctly aligned, before tightening them. You may need to push the panels gently into position to get the screw holes to line up correctly — for example, by pushing downwards on the side panels.
Once all the bolts are in position, you can tighten them. Do not overtighten the panel bolts: finger-tight is sufficient.
The top panel has two gaskets: one around the hopper, and one around the exhaust. Ensure these gaskets are correctly positioned before securing the bolts on the top panel.